Gutter Installation Jacksonville FL is an important home improvement project that protects the foundation of your house from water damage. Gutters are designed to funnel rainwater away from the house, preventing soil erosion that can weaken the foundation over time.
Typically, gutters are installed above the roof line of your home to encourage drainage. A professional gutter installer takes precise measurements and selects the best materials for your home to ensure a successful gutter installation.
Investing in gutter installation can help prevent damage to other costly parts of your home, such as siding and roofs. A professional gutter system will also direct rainwater away from your foundation, preventing water damage and safeguarding the integrity of your home’s structure. Lastly, proper gutters can improve your home’s value and curb appeal.
If you’re considering DIY gutter installation, it’s important to understand that the process is more complicated than it may seem. There are numerous variables that can influence the timeline of the project, including weather conditions and the condition of existing gutters (if applicable). Additionally, many homeowners discover that they’re not properly equipped to handle their own gutter project. This can result in additional expenses, such as purchasing new tools or paying for labor costs to fix mistakes.
Gutter installation is often a multi-step process, with each step of the job requiring extensive attention to detail. Inexperienced DIYers are prone to making errors that can cause significant damage, such as leaks and improper alignment. Professionals are familiar with the intricacies of the work and can provide a seamless, high-quality installation.
A professional gutter contractor will work with gutter problems and solutions day in and out, meaning they can spot potential issues quickly. With just a quick perusal of your home and yard, a professional will be able to identify the best location for joints, downspouts, and other gutter systems components and recommend the right materials, gutter protection, and other accessories for your unique situation.
Moreover, a professional gutter contractor will be aware of current building codes and industry standards that you might not be familiar with. They’ll ensure that your gutters are installed to the highest quality, preventing future issues and saving you money in the long run.
DIY Installation
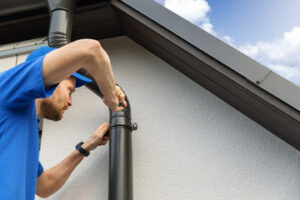
Gutter installation is not a project that most homeowners should attempt alone. Working at heights and handling heavy materials are potential safety hazards, and the results of a mistake could be costly or even dangerous. Hiring a professional roofing company to handle the project provides peace of mind, accuracy and efficiency throughout the process.
Before beginning the project, a professional roofing company will inspect the roof and gutter system to ensure that everything is in good condition and prepared for new installation. They will check that the gutter system is properly pitched and anchored, as well as that no holes or loose fasteners exist. They will also recommend a maintenance plan to ensure that the gutter system continues to perform as expected.
Having the right tools on hand is essential for DIY gutter installation. The tools you’ll need include a ladder that is stable and positioned on level ground. Safety glasses and gloves will protect your eyes and hands from sharp edges and debris. You’ll also need a tape measure and pencil to pull measurements, a drill for drilling holes for brackets, a pair of tin snips or a hacksaw for cutting the gutter material and a crimper for securing gutter end caps before sealing them.
When installing gutters at a corner, first install a slip-joint splice fitting to each end of the inside corner piece. Then trim the first length of gutter to the desired length, using a square and pencil to mark the line. Cut the gutter with tin snips, making sure to cut around the profile of the gutter and not into the paint strip. If the tin snips distort the profile, simply bend it back into shape with needle-nose pliers. Install the next length of gutter apron over the splice connection, and then install and rivet the splice fittings to each other. Continue the process until all the gutters and downspout outlets are installed. Finally, caulk all the seams with gutter lap sealer.
Before starting to hang the downspouts, mount the ladder and chalk a vertical snap line across the center of your home’s corner trim boards. Position the downspouts along this line, extending them past the front edge of the gutter to prevent overflowing and water damage. Then, to attach the downspout to the house, place a U-bracket over each downspout outlet and screw it in. If you prefer, you can also use pop rivets instead of screws.
Repairs
Gutter systems are prone to damage, even after proper installation. It’s important to perform regular inspections and repairs to keep your gutter system in good condition. Look for mildew, rust and other signs of deterioration, especially in areas where water collects. If you find these issues, you’ll need to repair the gutters or replace them altogether.
Leaking gutters can be mended with sealants, but if the holes are large you’ll need to repair the gutter with flashing. This is a sheet of metal that’s cut with tin snips to cover the hole, and it’s secured to the gutter with roofing cement or sealant. Spread a small amount of the sealant on a putty knife and apply it to the gutter with smooth strokes. Make sure to use waterproof sealant designed for exteriors, not bath or kitchen sealants, which can deteriorate over time.
Downspouts are enclosed vertical tubes that carry water away from the gutters. They connect to the gutters along one side of the house with sections called elbows that curve around the edge of the roof, and one end is crimped to fit into another elbow or downspout outlet tube. If downspout outlets loosen, it’s usually a sign of aging, but they can also be loosened by pressure from debris or from the weight of snow and ice.
If your gutters have lost their original slope, you’ll need to reinstall them. Start by marking the lowest point on the fascia boards, then mark the slope you want your gutters to have on each section of the house. Screw fascia hanger brackets to the gutter, spacing them evenly over the area you’re working on. The brackets should be about 18-24 inches apart. Then, measure the distance from the bottom of the gutter to where it joins with the downspout. Repeat the process on each 10-foot segment of the gutter, making sure it slopes a quarter inch lower each time.
If you’re using downspouts with open tops, add a splash block to the bottom of each one. This prevents water from flowing over the gutter and causing water damage to the house and landscape below it. You can also attach a downspout diverter to the bottom of your downspout to redirect the water flow from regions like hose bibs, sidewalks and electric meters.
Maintenance
Gutters are vital to a house’s structural integrity, as they collect and direct rainwater away from the foundation and exterior siding of a home. Investing in gutter maintenance and repairs can prevent costly structural damage, basement flooding, and other water-related issues.
Gutter repair and replacement can be a complicated task, but it’s important to have the right tools and expertise. A professional roofing contractor will have the tools and experience necessary to safely install and replace gutters, while ensuring a high-quality finish. In addition, a skilled roofer can spot potential problems like rotted fascia boards and incorrect slopes that could compromise the functionality of your gutter system.
Before starting a gutter project, homeowners should plan out how the project will be executed. This will help ensure that the installation is completed in a timely manner and can also prevent potential hiccups along the way. In addition, it’s important to consider external factors that may impact the timeline of a gutter project, such as inclement weather.
Using a ladder, carefully mark where the gutter will be installed. This will help you determine the order in which you’ll hang each section. Make sure to leave enough room between each gutter section for adequate flow and drainage.
Next, install fascia brackets at each of the marked locations. These should be spaced evenly, 18-24 inches apart, and secured with lag screws. Be sure to apply a waterproof sealant to each screw.
Once the fascia brackets are in place, begin installing the gutter sections. Begin with the lowest point of the gutter run and work your way up, making sure to create a proper slope of 1/8 inch per foot. During this step, it’s important to take into account any downspout outlets that will be installed at the bottom of each gutter section.
If you’re installing a corner gutter, use a strip miter to connect the two pieces together. This can be done by cutting a triangular piece of aluminum and securing it with a strip of self-tapping stainless steel screws or pop rivets (as shown above). Finally, install a downspout outlet at the lowest point of the gutter run and attach a drainpipe to it.